The settings involved in this article apply to most of the Denon amplifiers. However, there are always subtle differences between different models. If you find that the description is inconsistent with your amplifier, you can only study the instructions yourself.
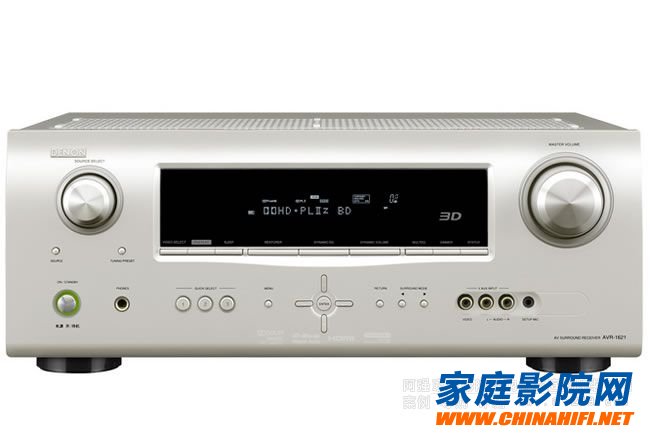
1. After connecting the new machine to the home, don't plug it in immediately. First look at the back of the machine. Is it similar to the picture below, but there are fewer sockets? What? The back of your amplifier is exactly the same as the one in the picture? Let’s first Worship the million people who can afford the flagship model of Denon!
When you connect, you may notice that there are many "DVD", "HDP", "AVR" characters on the amplifier. These are ignored. In the future, they can be changed at any time in the settings. The only thing to notice is that the analog signal is not needed. Inserted wrong, such as color difference Y, Cb, Cb, etc. For general applications, this step should be relatively simple.
2. Speaker parameter setting to make sure that the speakers are connected, and the polarity is correct, you can plug in the power cord and turn it on. Remember to turn the TV on. When you set it, watch the OSD on the TV. The small screen should be much more comfortable.
This step can be done in two ways, one is Auto Setup and the other is Manual Setup. Some players who use the amplifier for the first time may not trust the auto setup feature. In fact, this is quite powerful. The function of the Tianlong amplifier is from the third-party Audyssey company. The method is to place the microphone of the machine in the listening position, the machine emits a test tone, and then the sound received by the microphone is analyzed and calculated. Suitable for the setting of each channel speaker. For most fans who do not have a sound pressure meter, I recommend running Auto Setup at least once and then fine-tuning manually.
First, turn off all the things that can make noise in the room. Then the microphone is fixed at the position of the head of the listening position, the direction is facing the ceiling. It is best to use a tripod if conditions are available. The farther the better! If the subwoofer has more adjustable functions, it is best to turn off the LPF and set the phase to 0.
In the setup menu, select Auto Setup to enter the auto-set menu. You can make a simple setup before starting. 7.1 Configuration, select Normal or 7.1 in Amp Assign (depending on the model). If it is 5.1, then Set to Zone 2. After this, you can officially start the automatic setting. The amplifier will automatically send out the test tone from the speaker one by one, just press the button according to the screen prompts. Home theater network shopping guide!
After the test is completed, you can enter the Parameter Check to see the results. The problem with Audyssey is that it will take very weak low frequencies, so many bookshelves and even satellite boxes will be recognized as Large. It doesn't matter, we can change it manually. Enter Manual Setup. Speaker Configuration, as long as you have a subwoofer, it is recommended to set all the speakers to Small. Even if your speakers are floor-standing boxes, the ultra-low frequency processing is still not as good as the subwoofer. The lowest part of the bass. Only handed to the subwoofer, the bass will be cleaner and more powerful. But if you really like a lot of bass, you can set it to Large, and set the Subwooder Mode to LFE+ in the back BASS Setting (some models are Subwoofer Setup). MAIN. If all the speakers are set to Small in the front, then this BASS Setting is not important. The following is an explanation of the combination of several settings, it seems more clear.
1. Speakers - Small, LFE or LFE+Main (recommended) -- The bass of all channels is handled by the subwoofer. The speakers only have the sound of the Crossover setting above (the crossover will be mentioned later).
2. Speaker -Large, LFE -- The subwoofer only has the bass channel, which is the channel of the disc in the content of the disc. The sound of the speaker is complete and the crossover setting is invalid.
3. Speaker -Large, LFE+Main -- The subwoofer not only produces the sound of the bass channel, but also the sound below the crossover in other channels. The speaker emits the sound of the complete channel. In this case, the bass will be simultaneously from the subwoofer and For larger speakers, the amount will increase, but it may also be messy.
However, Tianlong's manual is relatively embarrassing to read, and the setup menu is not only English, but also not humanized, so that many fans have been groping for a long time after the new machine arrives at home, and often can not make a wonderful sound. Even some burn Friends give up in advance before they can find the best settings, so the equipment can not play all the potential, it is a pity. This article will start from the simple connection and setting of the Denon amplifier, and then explain some settings in detail, hope In this way, the performance of the equipment of the fans can be worthy of the money. There is also a LPF for LFE in the BASS Setting. This setting is a low-pass filter for the .1 bass channel. I suggest that you can set it slightly higher. , such as 120Hz.
The following Distance and Channel level suggest not to automatically set the value, but if the speaker is set to Small, Crossover Frequency is best adjusted, a little bit based on the automatically set value.
Front Speaker Setup. This is the setting that appears in the new model. The general application is set to Normal.
Next are some other settings, most of which are generally set by default.
Three.HDMI Setup
HDMI Audio Out: The default AMP is OK. Unless you want the sound to come out of the TV's small speaker.
Color Space: The default YCbCr is OK. Most video content is stored in YCbCr format.
RGB Range: If the previous Color Space is set to RGB, this setting is relevant. Generally set to the default Normal.
Audio Lipsync: Default On.
HDMI Control: If the default On. is set to Off, the HDMI pass-through mode will not be entered in the standby mode.
Standby Source: The source of the HDMI pass-through mode in standby mode. Depending on individual circumstances.
Power Off Control: Turn this on to turn off the amp when turning off the connected HDMI device. It is generally recommended to turn it off.
Three.Video Processing Setup
These are the options for video processing. They are in Manual Setup in 8- and older models. They are distributed in each Input option in models ending in 9 and 10.
i/p scaler: Video boost function. There may be OFF, Analong, Analog and HDMI depending on the model. Depending on the application.
Resolution: The resolution after the video is raised. Set to Auto or manually set the desired resolution.
Progressive Mode: Progressive mode. Generally set to Auto.
Aspect: When set to Full, the amplifier will pull the video to full screen. For example, the 4:3 screen stretches to 16:9. If it is set to Normal, it will not stretch.
4.Audio Setup
EXT.Subwoofer Level: This setting is only useful when using multi-channel analog inputs to ensure that the bass channel of .1 is enhanced.
2CH Direct/Stereo: Set it to Custom, which allows you to play 2 channels of music with another set of speaker parameters. If you set it to Basic, you can use the same parameters for both channels and peace when playing two channels of music. .Custom is only useful when the surround mode is Direct, Stereo and Pure Direct.
Dolby Digital Setup: This setting is only available in older models. It is used to turn on Dolby Digital's Dynamic Range Compression. Set to Off. You can also use night mode when you don't want to quarrel with others. Well.
Auto Surround Mode: Turn this option on to let the amplifier remember the surround mode used on each input. It is recommended to turn it on.
EQ Preset or EQ Customize: Here you can set the unused EQ to Not Used, so that you can press the button a few times when selecting EQ.
Five.Input Setup
As mentioned earlier, Tianlong's amplifiers have pre-named each input, such as DVD, HDP, SAT, etc. In fact, this definitely does not include all applications, it seems a bit more. In this menu you can Your actual connection status is the name of the custom input, which is not detailed here.
Tower Air Fryer,Air Fryer 3.5L,Digital Air Fryers,Industrial Air Fryer
Ningbo Anbo United Electric Appliance Co.,ltd , https://www.airfryerfactory.com