This project is about making a solar fox pendant with amber LED eyes. The top of the pendant is pierced with a hole to hang the pendant. In daily life, we can wear it as a necklace or earrings, keychains and other accessories, and even hang it on the window as an ornament.

Figure 1 LED fox pendant
Step 1: Prepare the welding tool (as shown in Figure 2)
Electric iron
2. Solder
3. Diagonal cutter
You can also choose support frames and needle-nosed pliers to help with your work.
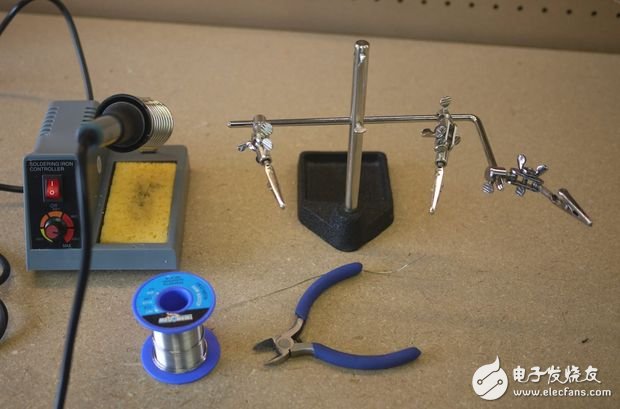
Figure 2 welding tool
Step 2: Schematic and parts (as shown in Figure 3/4)
1. C2-47uF ceramic capacitor (blue-large)
2. C3-10uF ceramic chip capacitor (blue - small)
3. C4-0.1uF time-scale capacitor (brown)
4. U2-MCP6542 master IC
5. SC1 to SC6 - BPW34 Photodiode
6. R5-330 ohm resistor (orange belt)
7. R1/R2/R3/R4-10M resistors (brown and black)
8. D1 and D2-amber LEDs
9. Switch - single pole double throw switch
10. C1-0.033uF (black)
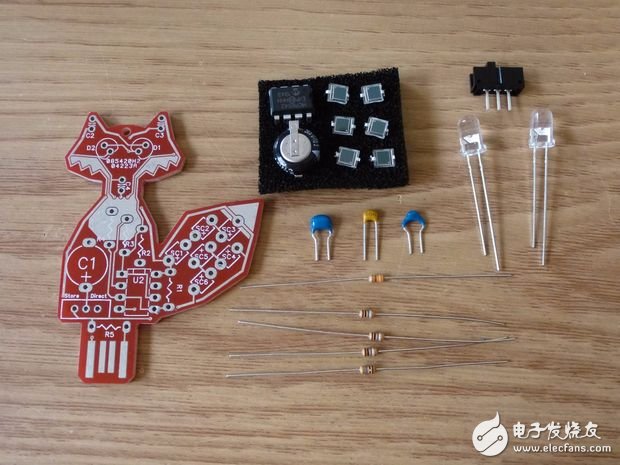
Figure 3 parts
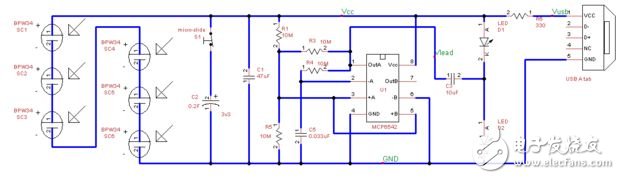
Figure 4 schematic
This article is selected from the "Wireless Communications Special Issue", more quality content, download now

Step three: soldering capacitor
Assemble our work from the beginning of the capacitor. Although these capacitors look similar in appearance, it is important to solder the corresponding capacitors to the appropriate locations! Second, these capacitors are not divided into positive and negative, so you only need to divide the position of these capacitors. Let's tell you how to read the number on the resistor.
The number above a.C2 is read as "476", the first two digits are its effective digits, the third digit is the multiplier, and the unit of resistance is Farah, so 476 represents this 47*10^6 Farah
b. The number above C3 is “106â€, which means the size of C3 is: 10*10^6 Farah
The number above c.C4 is read as "104", which means the size of C4 is: 10*10^4 Farah
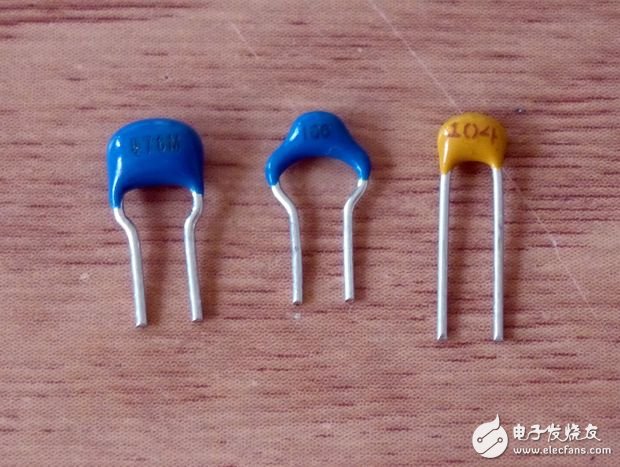
Figure 5 capacitor
If you have any experience with soldering before, here are some basic steps to introduce you. If you already have welding experience, you can skip this part.
1. Hold the hand grip of the soldering iron with your right hand and control the hot tip of the soldering iron near the contact point of the capacitor pin. The hot tip of the soldering iron needs to reach the pin of the capacitor and the solder joint of the board.
2. Hold for 2-3 seconds
3. Touch one end of the solder to where you are currently soldering. If the soldering iron is hot enough, you will immediately see the solder melt.
4. The solder melts into the solder joint and the capacitor pin, which connects the two like water.
5. Once the solder covers the solder joint with the capacitor, remove the solder and remove the soldering iron.
6. Do not touch the solder during its cooling until the solder solidifies. (Because it's still hot, the temperature is up to 380 degrees), the general solder cooling takes 2-3 seconds
7. Repeat steps 1-6 to solder other capacitors.
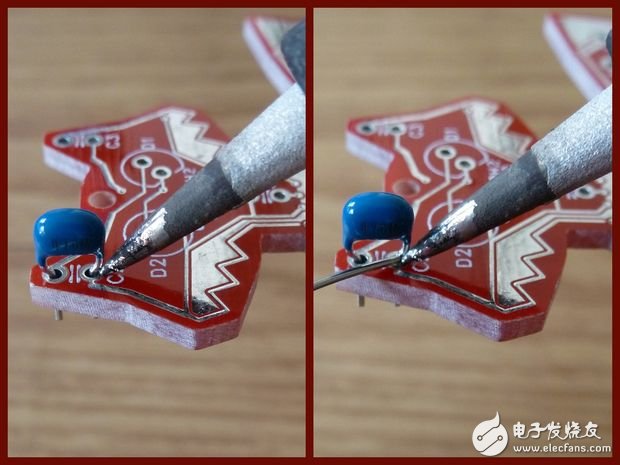
Figure 6 welding capacitor
Step four: soldering resistor
The soldering of the resistor does not distinguish between the positive and negative electrodes. The resistor pins are bent into a U shape to allow them to enter the slot of the board. It is recommended to start soldering from resistor R5.
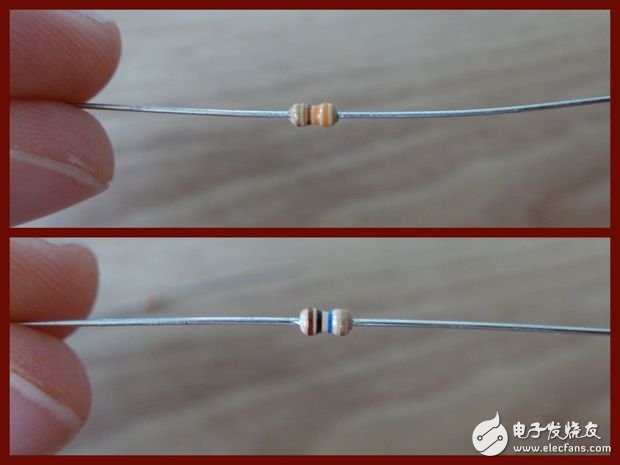
Figure 7 resistor
Alternatively, if you bend the pins of the resistor, you can also solder from the back, but be careful that the resistor falls off the board. In general, we are going to start soldering from the front of the board, as this will make the back smooth and more comfortable for those wearing the pendant.
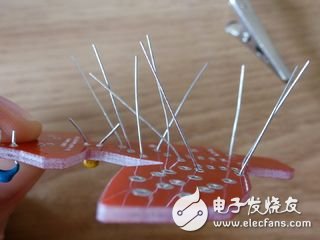
Figure 8 welding from the front
The remaining resistors R1-R4 are handled in the same way, mounted on the board and soldered from the front.
Step 5: Soldering the chip
The next welding target: the fox's brain. Be very careful about electrostatic currents, which can cause the chip to fail. In general, we must connect ourselves to the ground by touching large metal objects before processing the chip. Release the static electricity from your body.
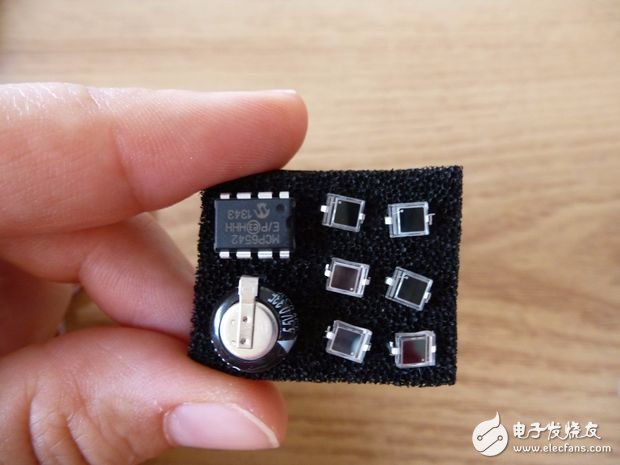
Figure 9 chip
Place the chip on the board, paying attention to the matching of the chip and recess on the chip to match the pin of the square slot on the board. You need to put the chip in place by squeezing it at each edge of the chip. The soldering method of the chip can be soldered on the front side of the board as in the previous soldering method. Of course, it can also be on the back side, paying particular attention not to solder the pins of the chip together.
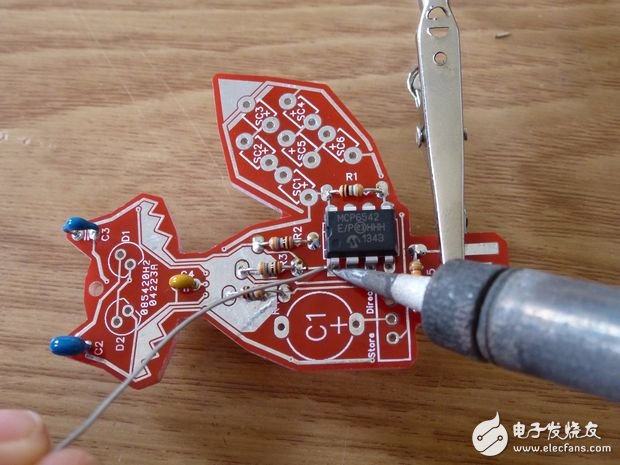
Figure 10 solder chip
Step six: soldering supercapacitors
Note that the positive and negative poles of the storage capacitor are distinguished. Its negative pole is at the top, a "-" symbol is marked on the metal strip, and the positive pole is at the bottom of the capacitor. Just such a small component can make your fox run for 3+ hours!
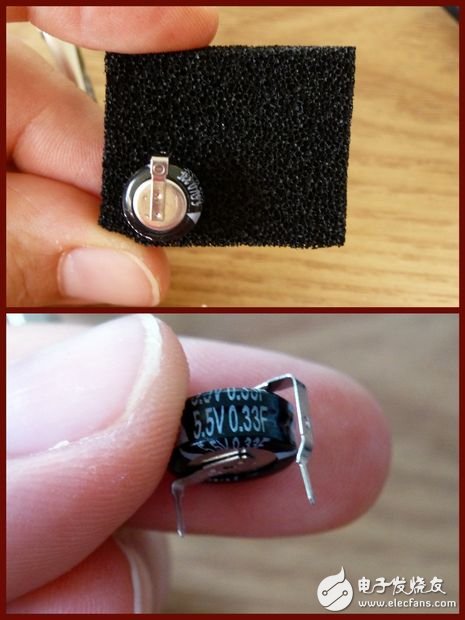
Figure 11 Supercapacitor
Start welding from the front to prevent falling.
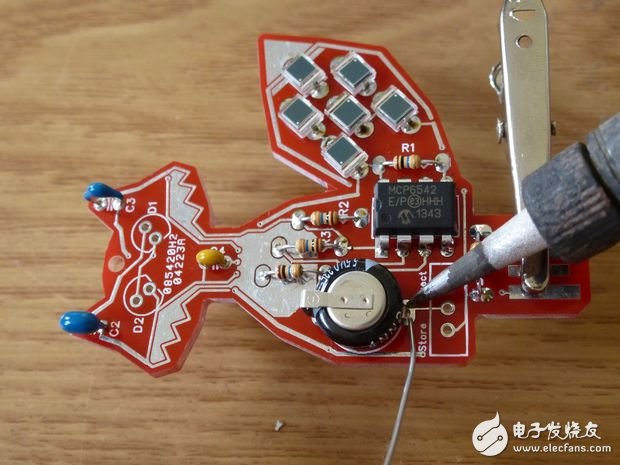
Figure 12 Welding supercapacitor
Step 7: Welding switch with LED eyes
The welding of the switch also does not distinguish between the positive and negative poles. Warning: The switch is made of ordinary plastic. If the soldering iron touches it, it will melt easily and damage the components.
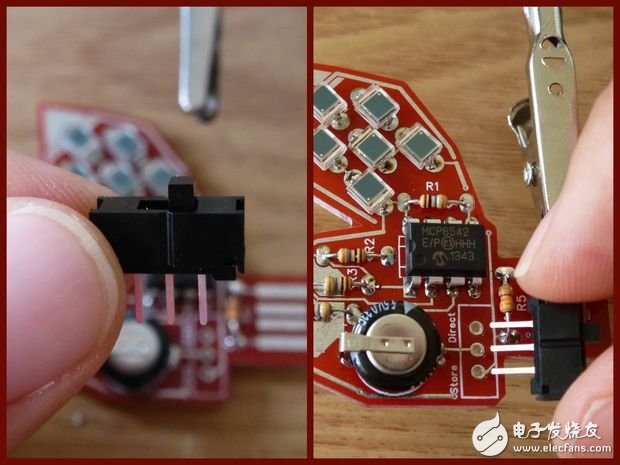
Figure 13 switch
It is recommended to weld the circuit board in reverse when soldering the switch, as shown in Figure 14. Place it on the table to solder, so that the sub-switch will not fall.
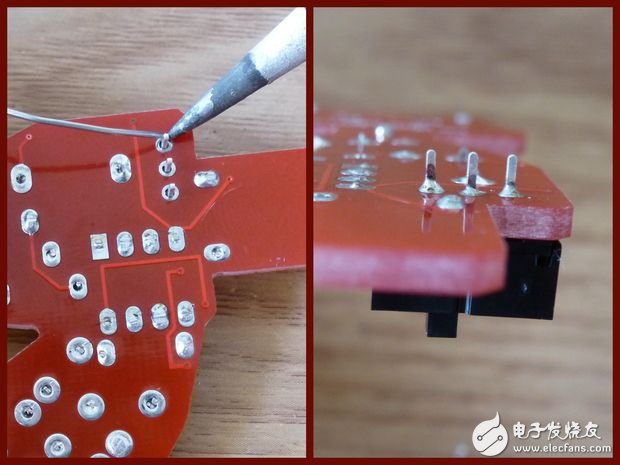
Figure 14 welding switch
The difference between the components that have been soldered is that the LEDs are soldered to distinguish between positive and negative electrodes. Fortunately, the positive and negative LEDs are easier to distinguish.
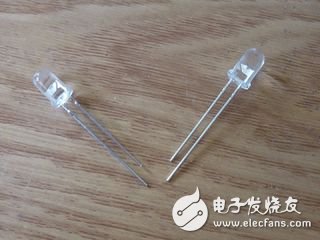
Figure 15 LED
The first observation method: the shape of the two lead wires in the tube body is observed from the side. The smaller one is the positive electrode
The second type of pin identification: the length of the pin is positive and the short is negative
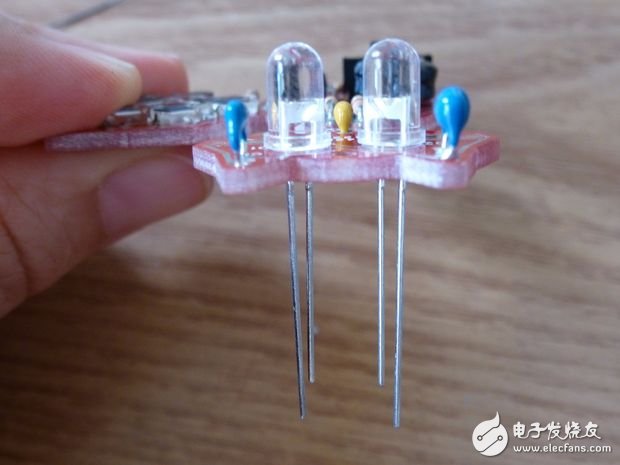
Figure 16 soldering LED
If you weld in a bright enough environment and solder it properly, our fox pendant will blink when it is soldered.
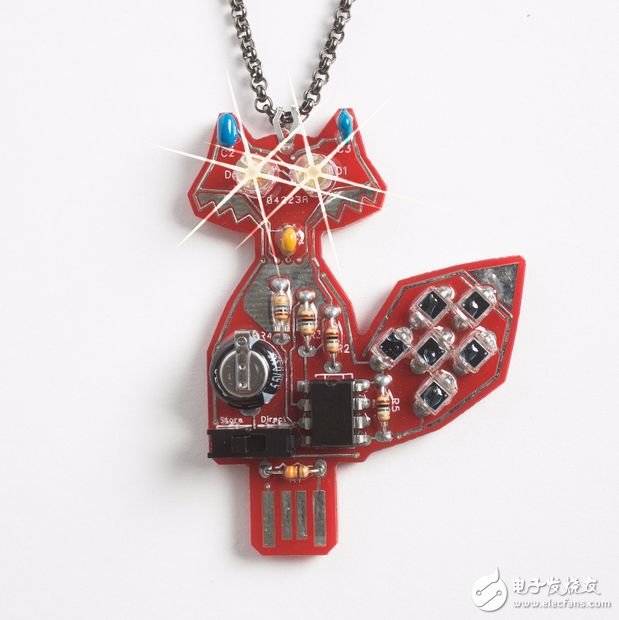
Figure 17 blinking fox
Step 9: Fox pendant finished
The first time charging a fox is recommended to fill the supercapacitor, and it can store an additional few hours of power when you are fully charged.
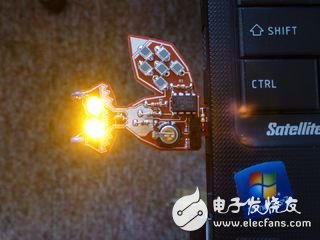
Figure 18 Charging the fox
How to play fox:
In the "direct" mode, the fox can extract energy from the surrounding light. If the surrounding environment is dark, then the fox will not blink. If it is bright, the fox's eyes will show a shining charm.
It should be noted that not all light sources have the same effect. It is also very fun to explore the light by yourself to make the fox blink.
How to charge:
The switch selects the "storage" mode, which can be connected to the black storage capacitor of the circuit when charging
a. Plug in the USB interface, wait 2 minutes until the LED is really bright and bright, if the brightness of the LED does not change, it means it is fully charged.
b. Solar - find the light source and let it stay under the light source: 10-15 minutes
How to clean the fox:
Wash it with a mild soapy water. It may stop flashing during the cleaning process, don't panic. When it is dry again, it will start to flash. Do not put it in the dishwasher or washing machine, as this may damage the components.
3.6V-3.7V Li-Ion/Polymer Battery Pack
5V & 6V Regulated Li-Ion Pack
7.2V-7.4V Li-Ion/Polymer Battery Pack
10.8V-11.1V Li-Ion/Polymer Battery Pack
12V - 13.2V Regulated Li-ion/Polymer Battery Pack
14.4V-14.8V Li-Ion/Polymer Battery Pack
18V-18.5V Li-Ion/Polymer Battery Pack
21.6V-22.2V Li-Ion/Polymer Battery Pack
25.2V-25.9V Li-Ion/Polymer Battery Pack
28.8V-29.6V Li-Ion/Polymer Battery Pack
36V-37V Li-Ion/Polymer Battery Pack
46V-54V Li-Ion/Polymer Battery Pack

Li Ion Battery Pack,Lithium Ion Battery,18650 Li Ion Battery Pack,Panasonic Li Ion Battery Pack
Asarke Industry Co., Limited , https://www.asarke-industry.com