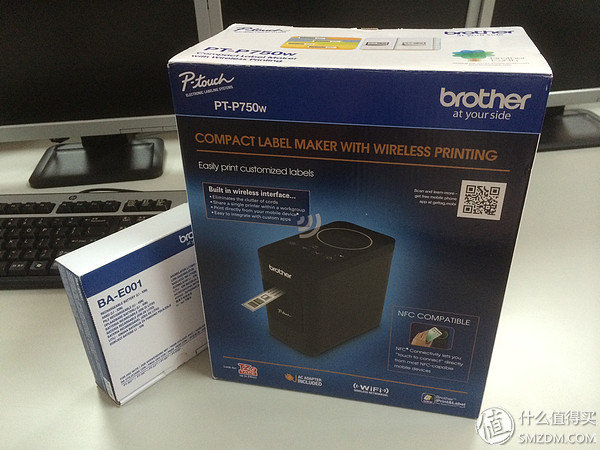
This kind of label printer is also starting to grow grass under the recommendation of Aunt Zhang. ). After watching it for a long time, I took a look at Brother's PT-P700, but when I accidentally tapped into the new PT-P750w page, Wifi and NFC this high-powered feature suddenly caught me. . . But the price is not so beautiful and is twice as expensive as the previous generation
. In the entanglement of prices and new features for a month, until one day, the conscientious Meiya heard my call, understanding the price reduction! ! Immediately and place an order (connected here: ). Since this group is going to use wirelessly, how can the battery be less, and then it is handy to bring a lithium battery, and then it is a long waiting time (customs for too long to worry about being taxed), and ultimately no tax security.
After an hour of research, I found a serious problem: Brother has a serious lack of suspicion , As the biggest highlight of this machine, WIFI and NFC functions are not mentioned in the manual at all, and the setting method is extremely unfriendly to ordinary users and it is estimated that it is difficult to get started. I saw a lot of friends who saw my broke into this section, if not, I would blame me.
. Holding the responsibility for everyone and the desire for gold coins, this article will introduce the function of this part in detail.
==================== Split Line 1========================
OK, here's the start of the sun list. As usual, the open plan has been eaten by the impatient landlord directly inside
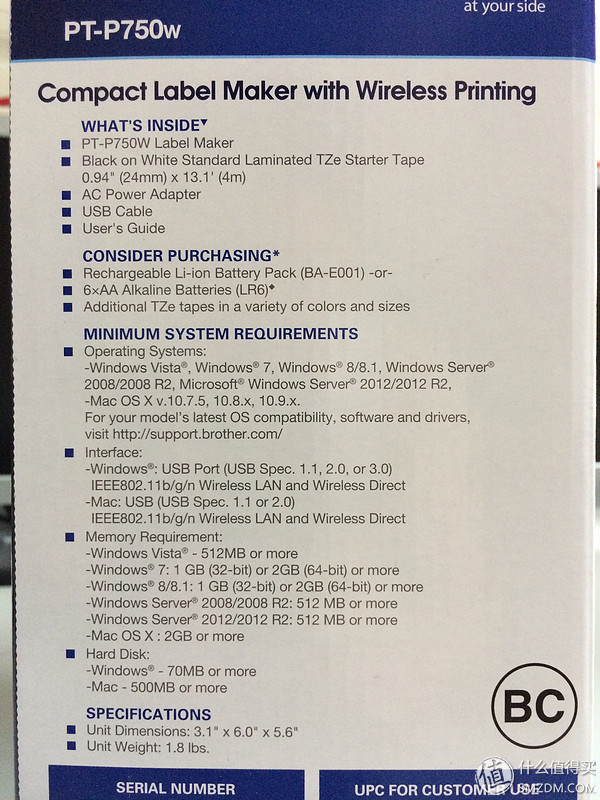
The specific parameters of the side of the box, we can look in detail, there is a detailed list and system requirements
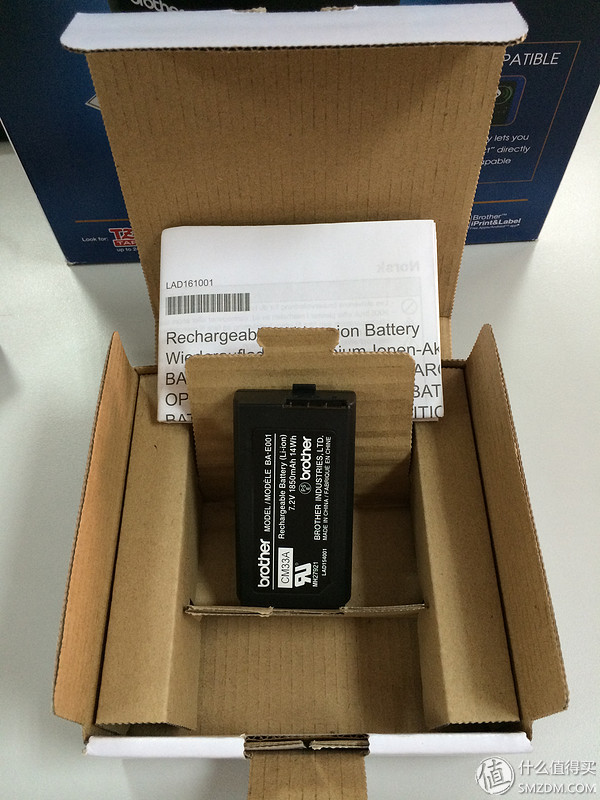
Battery parameters and supporting equipment, 1900mah. This battery was bought by a third party in Meiya and it is officially not available. The model is BA-E001.

Battery out of the box, so a big box is a waste of feeling
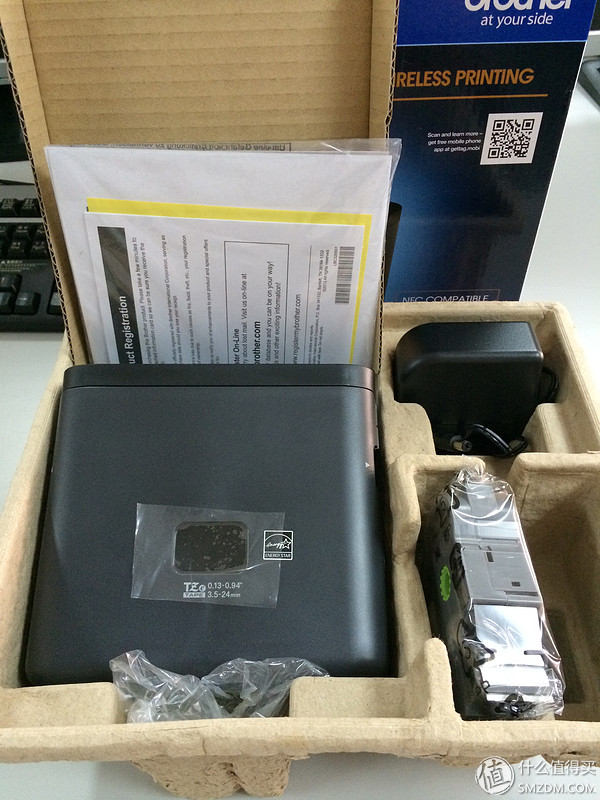
Unpacking the machine, including the body, power adapter, 4 meters black and white 24mm wide sample ribbon roll, a data cable
When I first got the battery was dead, suddenly found that Emma, ​​there is no charger swollen. Fortunately, after trying to find the machine itself can charge the battery .
The main body of the machine is still quite big, and it is almost like a small stereo.
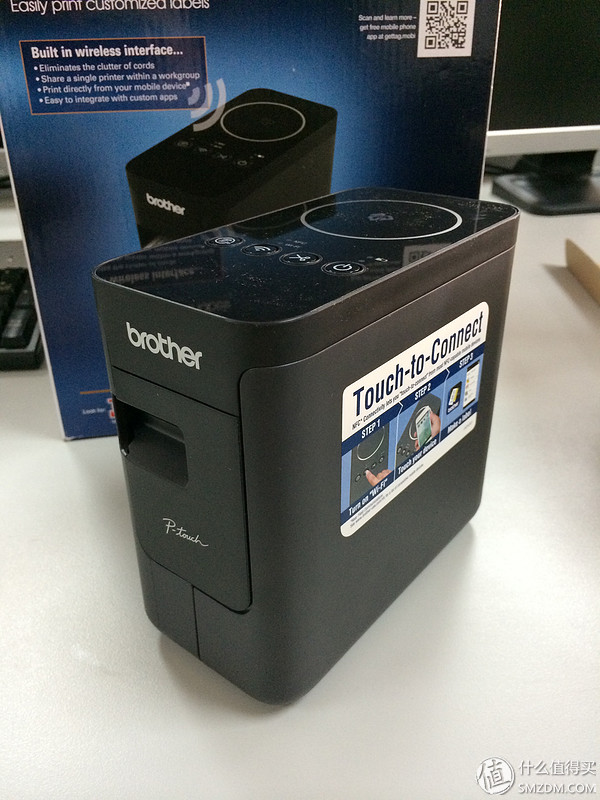
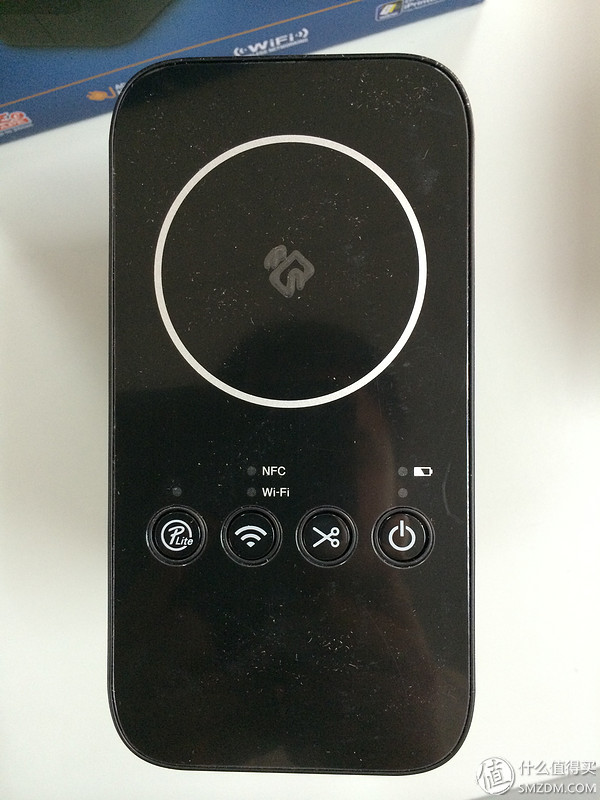
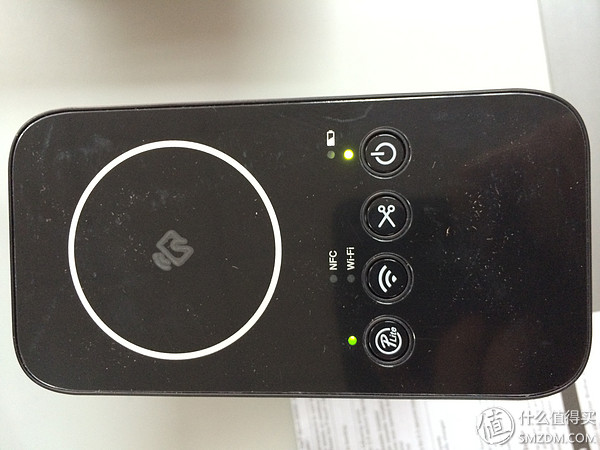
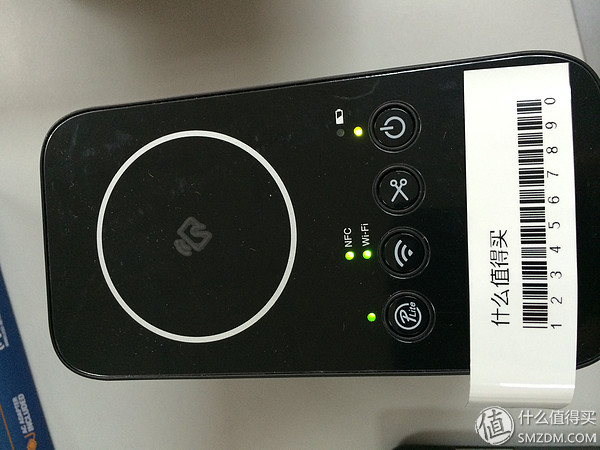
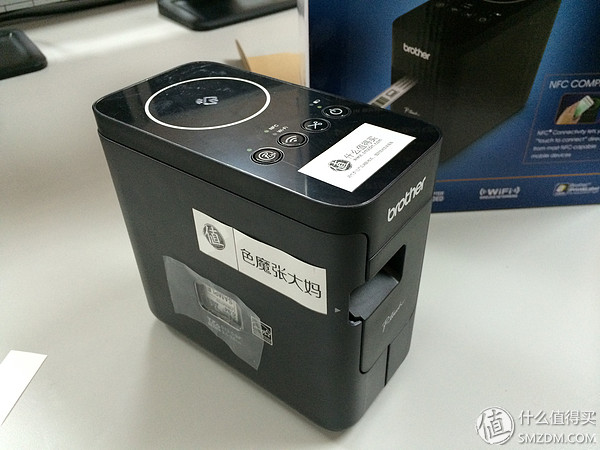
The top close-up, the large circular area is the NFC sensing area, the following are the P-lite button/indicator (this cargo pit, the manual did not mention it at all, will be described in detail later), Wifi/NFC button/indicator, manual Trim (feel no effect), power switch and work indicator, and battery status indicator
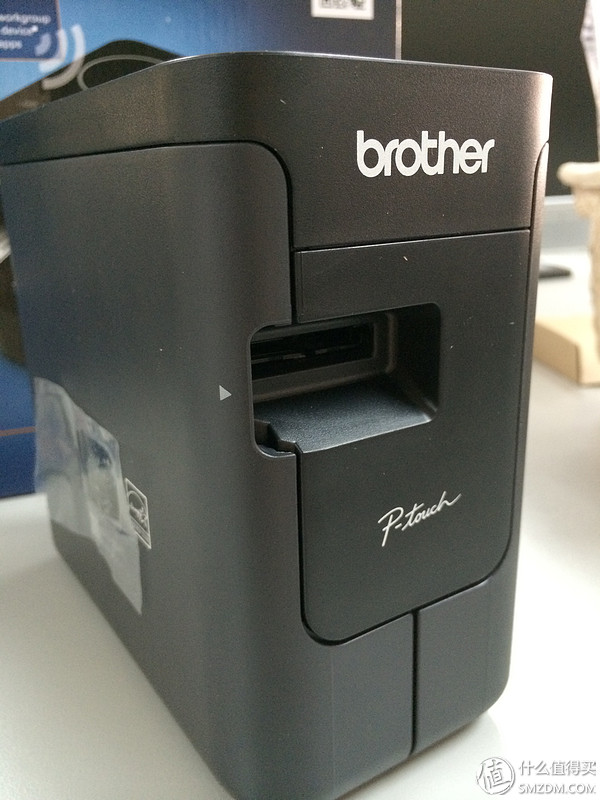
Front paper outlet close-up, the machine supports 8 ~ 24mm label stickers
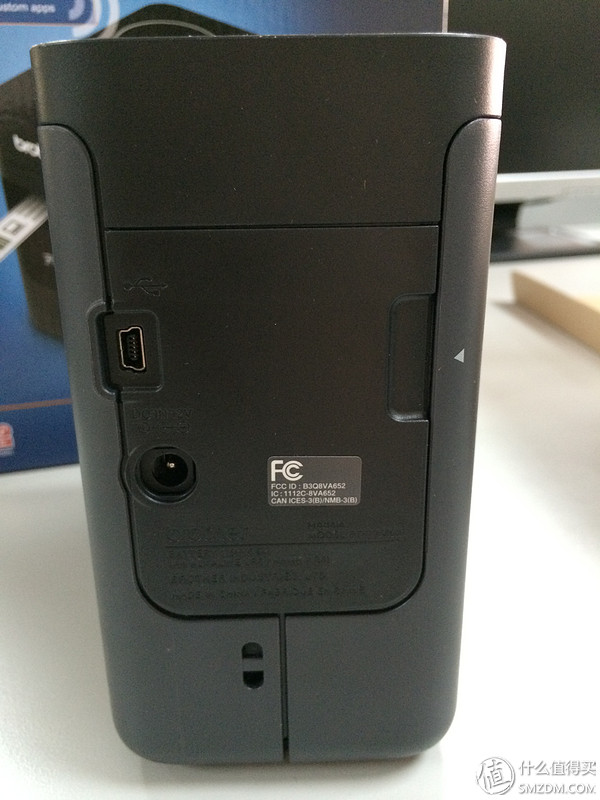
Behind the power interface and data line interface, and ribbon cartridge switch. Actually still mini usb line. . . . .
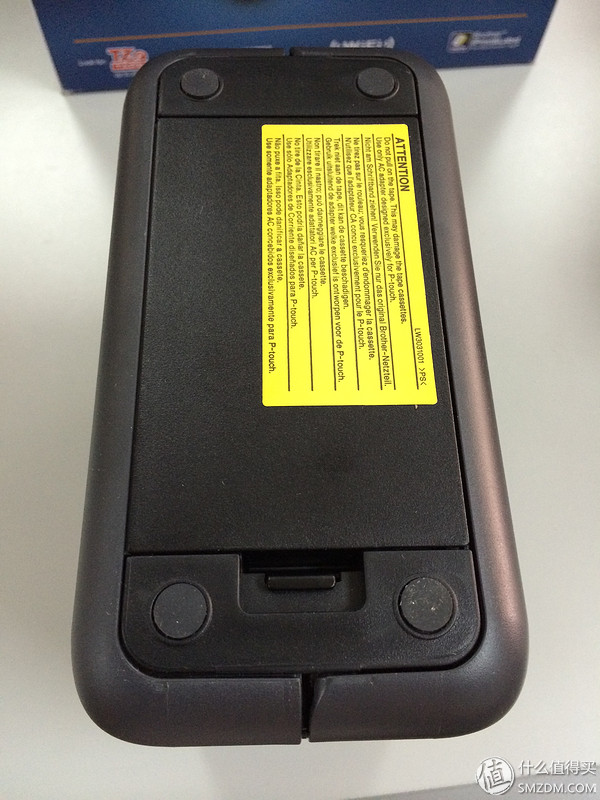
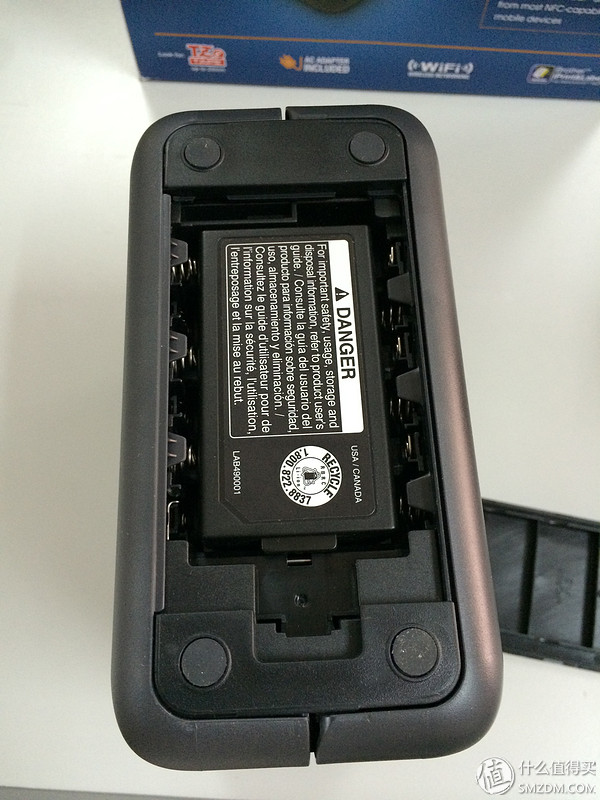
The bottom is the battery compartment
After opening it is like this, out of a dedicated lithium battery, you can also use 6 AA batteries

Put on the battery ready to start! !
Almost forgot the ribbon. . .

The ribbon compartment opens from the side opening

After opening it is like this

Color bands, note alignment

The assembly is completed, the following please help HTC One and iPhone 5s to participate in the evaluation

=================== Split Line 2=======================
First of all, we start with its simplest method of use is the phone with NFC. (iphone does not have nfc, leading to a series of tragedies, described in detail later)
First press the power switch, the power light, P-lite light.
Press Wifi/NFC button, this time you can use NFC to connect
At this time, open the mobile phone app: iPrint&Label (appstore is free, GooglePlay is also free, but may need to over the wall), open the NFC and the phone close to the sensor area, click through the NFC connection (Wireless Direct mentioned inside is open by default , which will explain how to switch modes or turn off)

After finding the device, the printer will automatically establish a wifi hotspot and connect the mobile phone so that it can be used.

Enter the software home page, you can see there are five options.

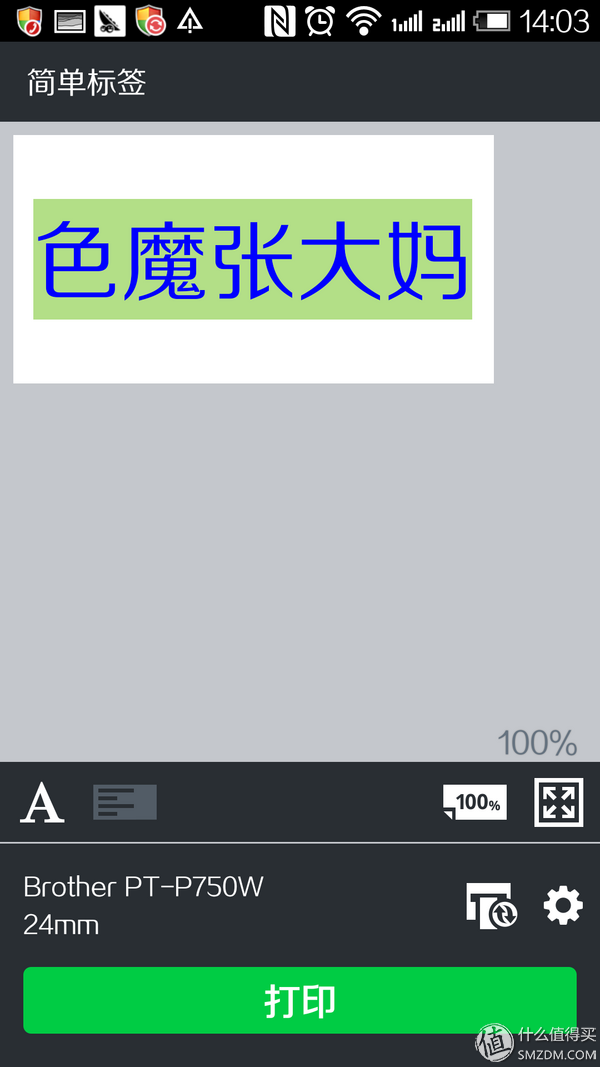
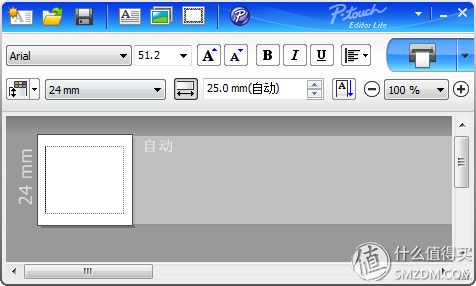
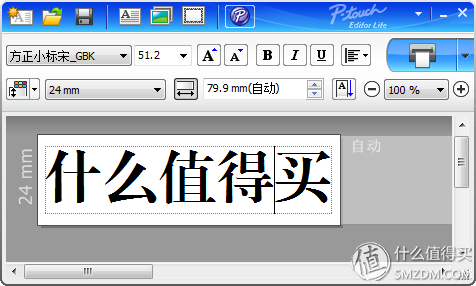
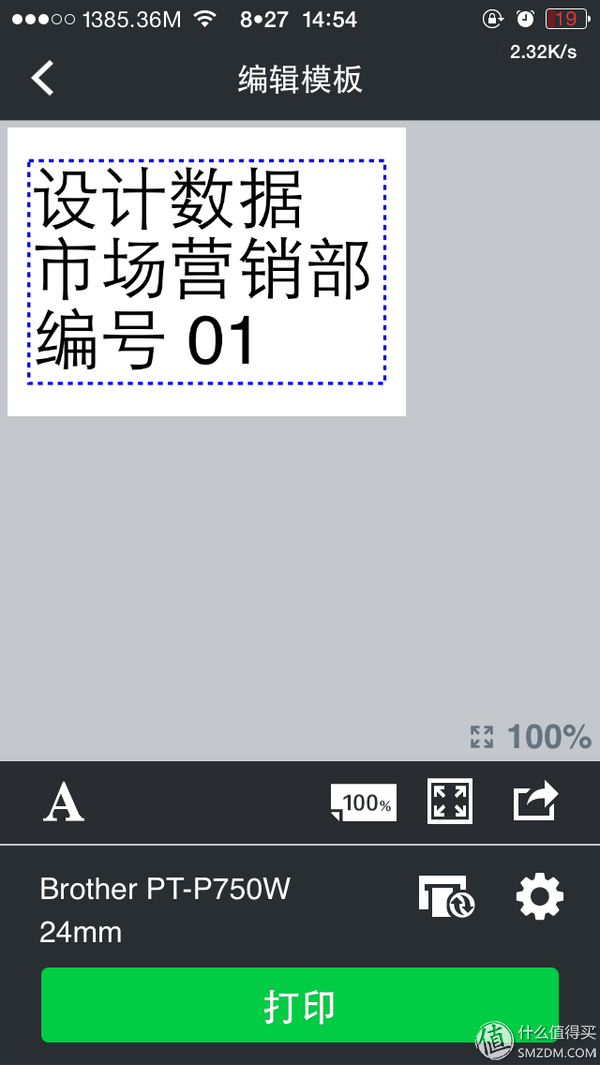
Into a simple label, in fact, is a pure text label, enter the text, the lower left corner "A" button to adjust the font, style and size, press the green print button below to print
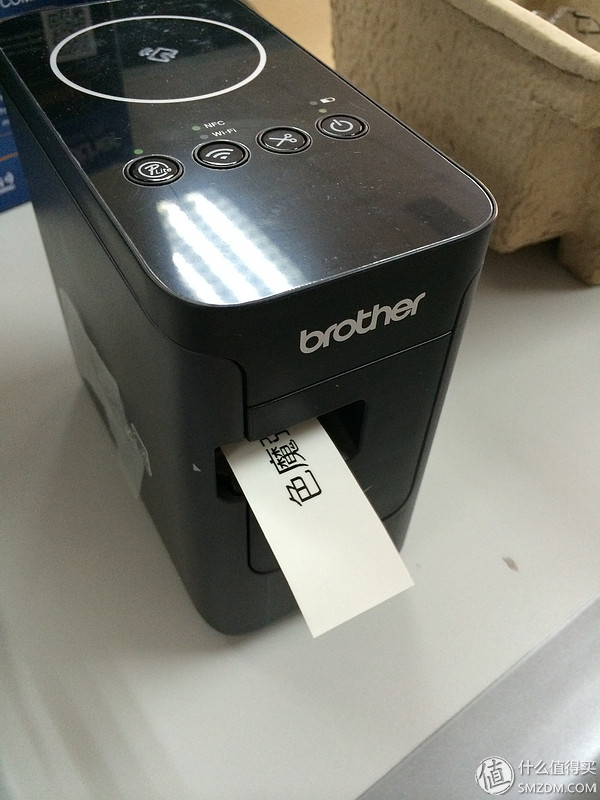
The printing process is as follows
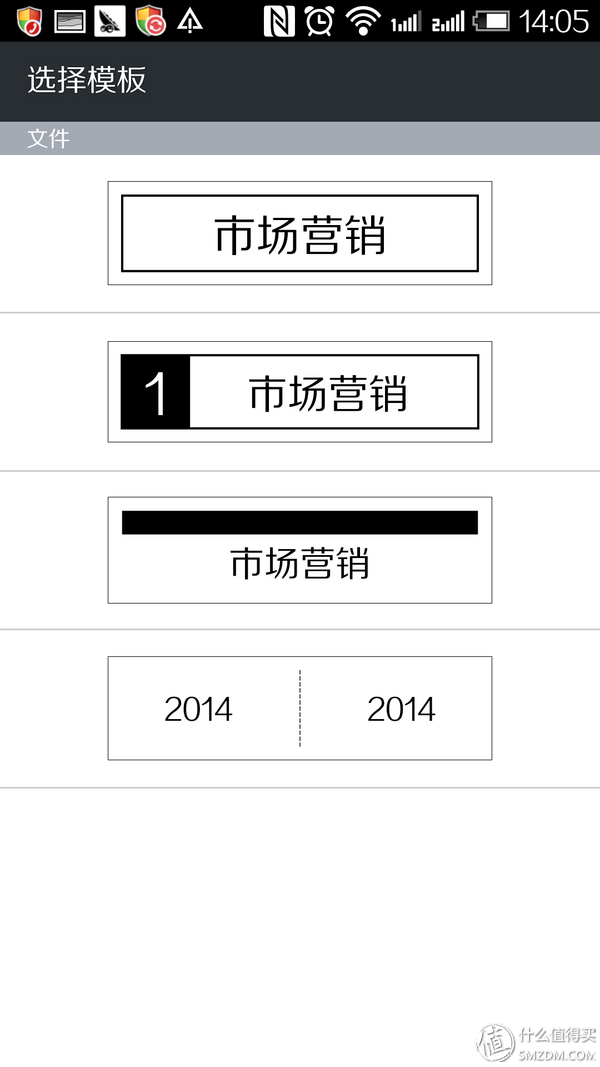
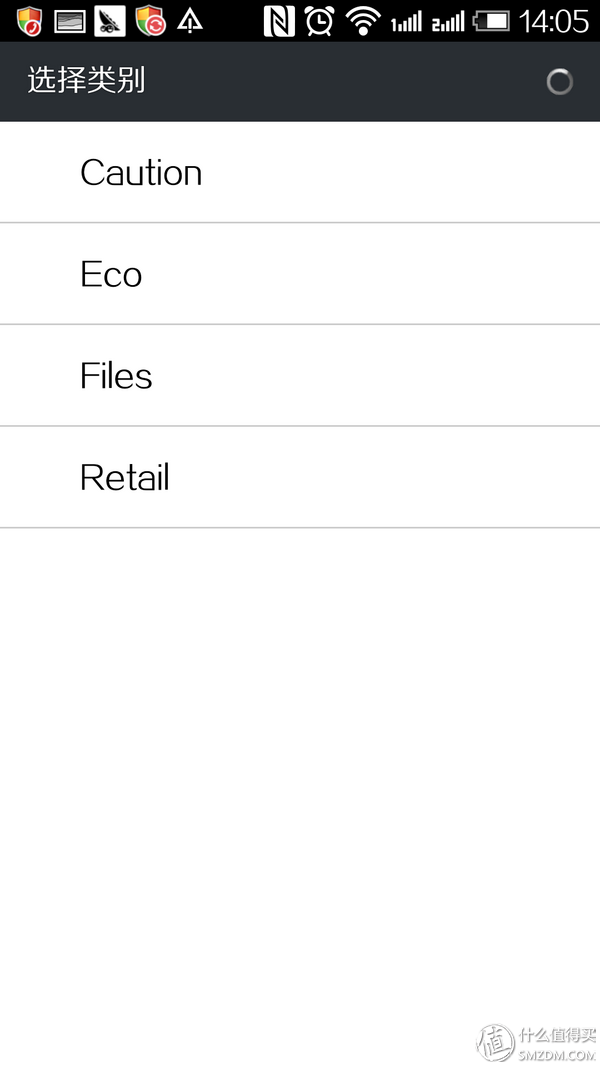
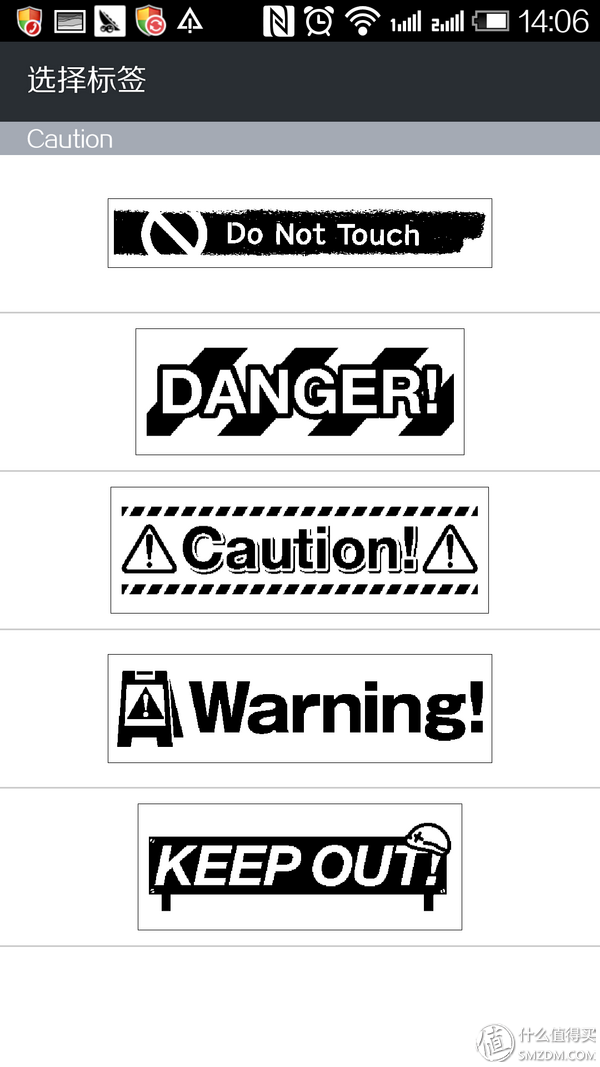
After entering the second option is a variety of use templates. It must be mentioned here is that the ios client comes with a template and download template is much less than Android, not science. I use Android to demonstrate, we can see that the basic coverage of the common situation
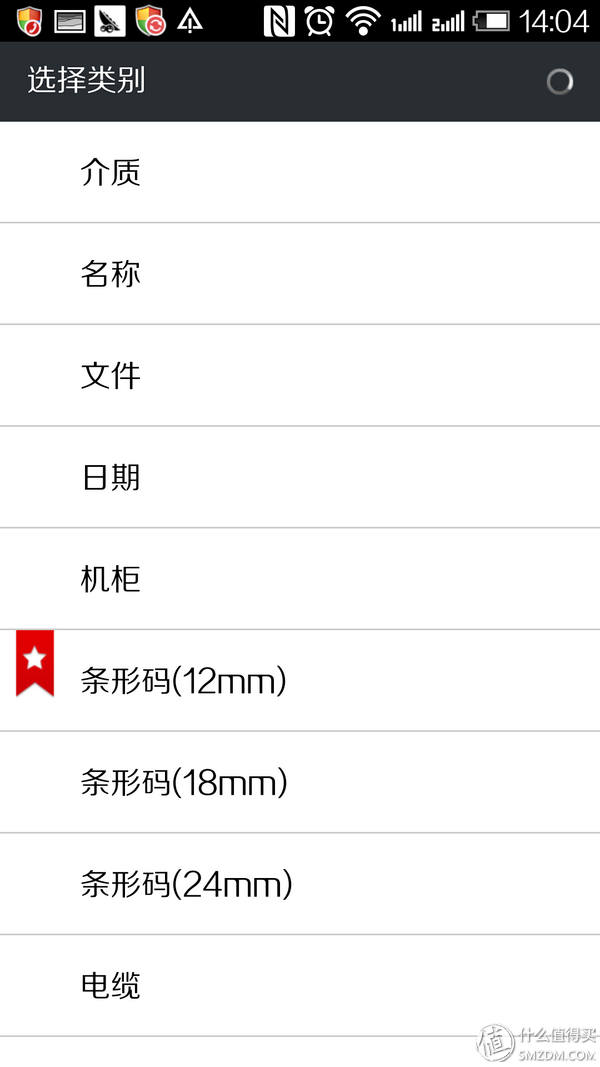
Everyone can look at the default format, I chose some


The barcode printing effect is as follows
The next option is to pre-set some picture format tags, full of interesting
The print page is as follows and can be resized

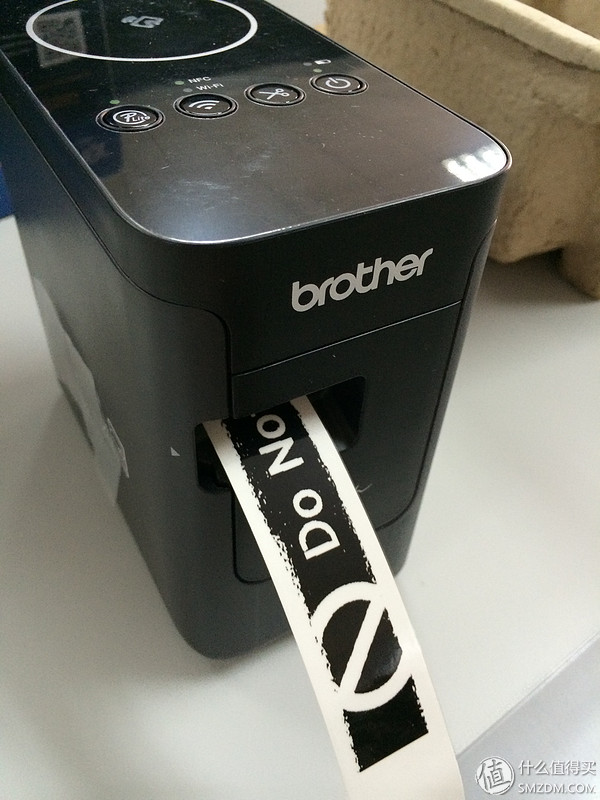
Printed. . .

The fourth "picture" option allows you to select the pictures you download and design in your mobile phone gallery. You must let Ms. Zhang exit the country.
The lower left corner crop button can be resized

Play a few labels, try to choose a better picture, otherwise it does not look good
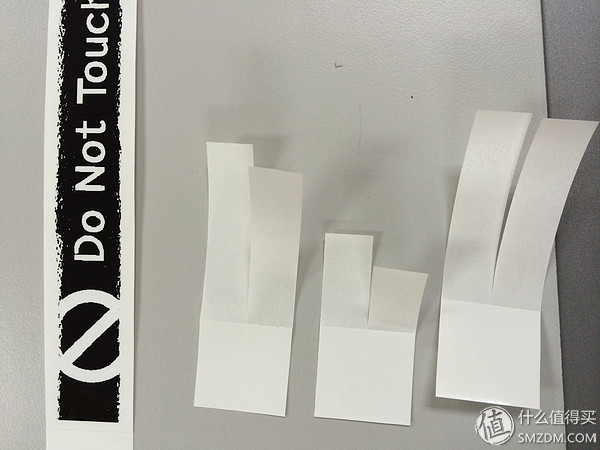
 Label comes with adhesive, can be peeled off, you can see the ointment is always leave a blank 24mm24mm bar, unless you print multiple labels in a row, or the front of the first will always appear. Another 24mm ribbon can be divided into two 12mm, we can see the layer below the ribbon is a well-separated layer of viscose is complete.
Cover image, Aunt Zhang V5
========== Split Line 3==============================
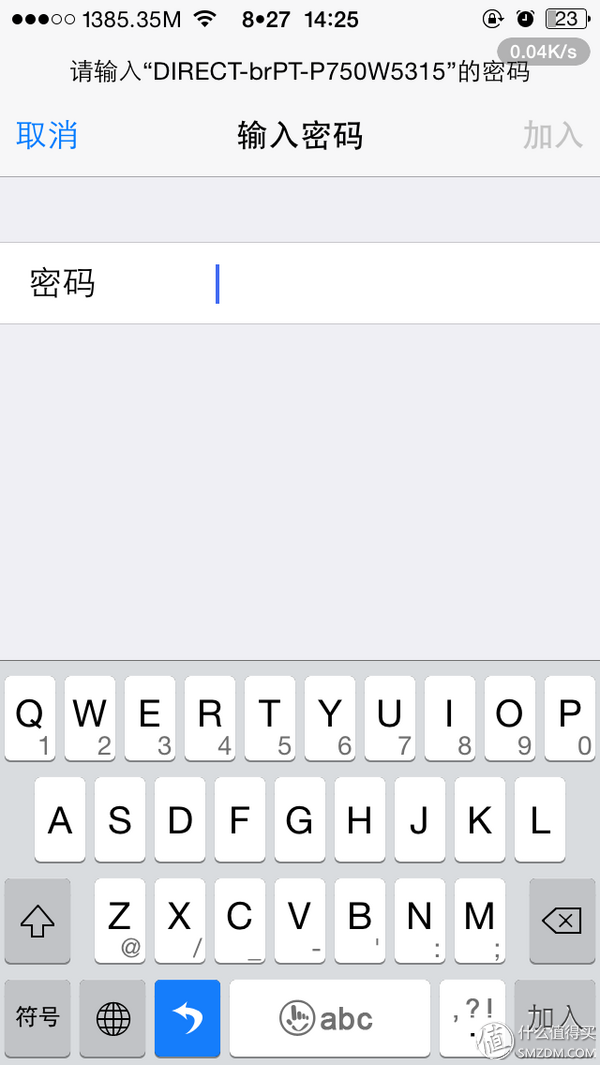
This section is the beginning of a series of tragedies. For NFC-free machines (such as the iPhone), how do you connect? How can the machine be added to the LAN to allow multiple devices to use it? Sorry, what's on the manual! What! All! No! Say!
Both of them are only trying on their own. First of all, I tried to connect the iPhone to the hotspot established by the printer. Is this DirectXXXX
Then the tragedy began, the need for a password, rummaged through the instructions and the chassis, the body can not find this damn password (later through the computer settings software that the password is, will be described later)
Fortunately, it seems that only the computer can see if there is a way to set up, Thinkpad appeared
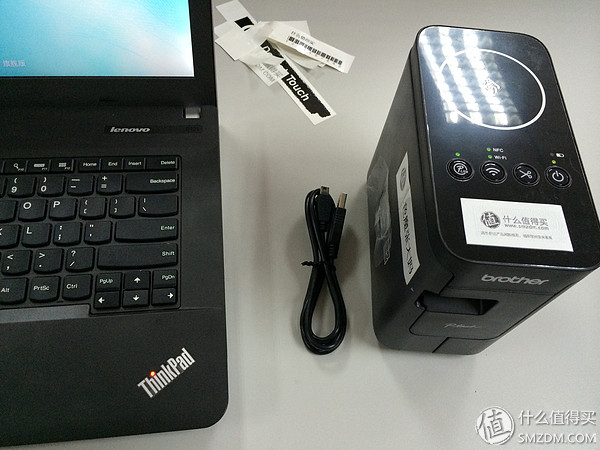
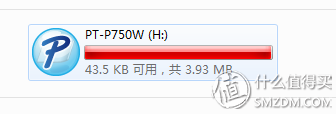
After connecting to a computer, a simple driver is automatically installed, and then a storage device pops up
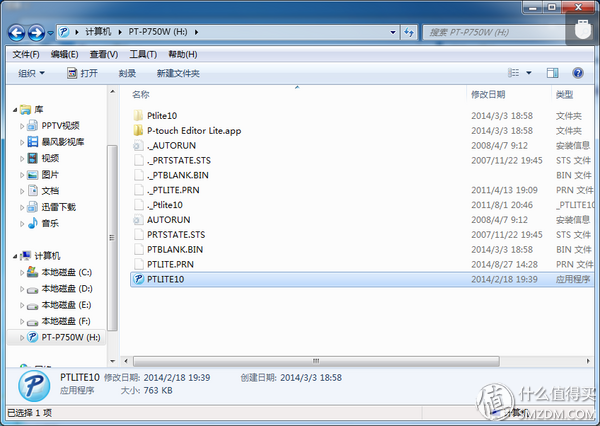
After opening it is this, we can see the following documents. Which Plite10 is a quick utility, you can directly manipulate the printer after opening, of course, the function is also more basic. If you need a complete experience, you also need to install the official website program, described in detail later. Here we need to introduce the use of the P-lite button mentioned at the beginning. To use this simple tool, you must open the p-lite button, but at the same time you cannot use the full editing software and configuration tools downloaded from the official website. If you close it, the effect is the opposite.
After opening it is like this
The top left and right buttons are new, open, save, insert text box, insert picture, adjust size
Insert text effects are as follows, you can adjust the font, size, style
Insert the picture as follows

You can see that there is no way to configure wifi, it seems that you need to find the answer on the official website. First of all, due to the lack of listing on the domestic market, the official website has no relevant content, so it is necessary to go to the official website of the United States. The screenshots are as follows:

It is worth noting that the U.S. website supports Chinese display (it is very conscience, but I forgot to change)
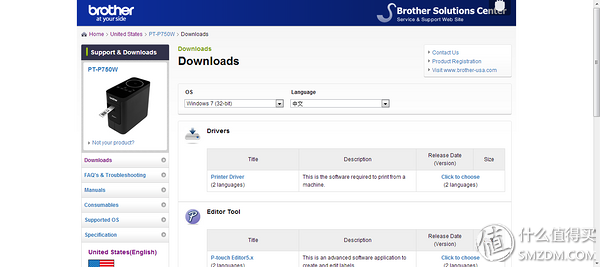
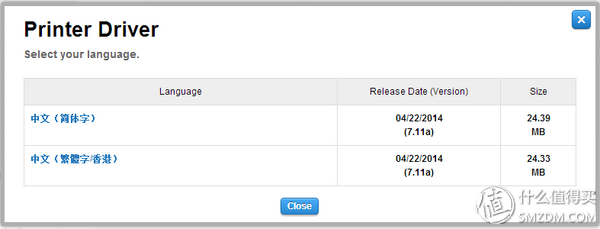
Download the corresponding driver, you can see there is a Chinese version, there are simplified and traditional
In addition to the driver, you also need to download editing software, system configuration tools, all have a Chinese version. What other firmware upgrades and advanced management advice is for computer based people to avoid brushing into bricks

Under the good, first open the printer setup tool and finally see the communication settings
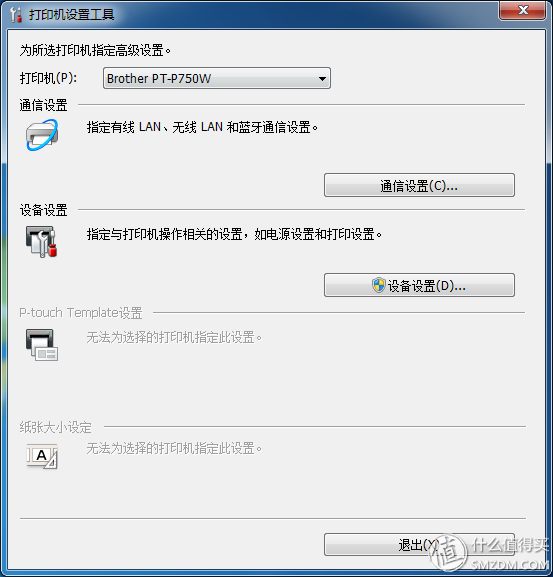
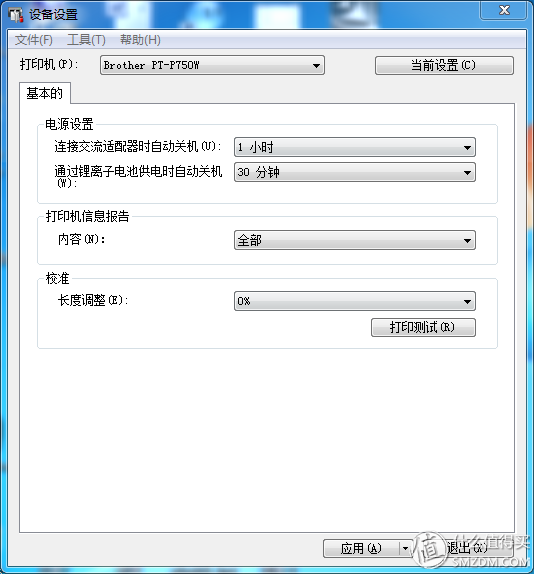
Look at the contents of the device settings: automatic shutdown, calibration, test what
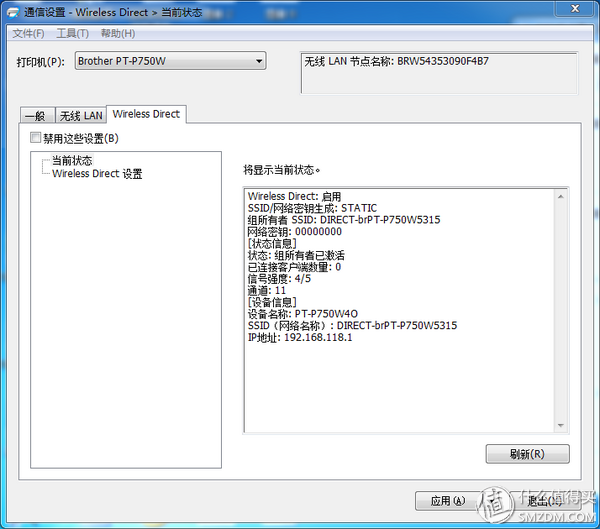
Then the communication settings, this part is very important, generally useless inside, the first is the wireless direct connection, finally see the password it, in this mode is a separate network of mobile phones and printers, convenient and quick connection
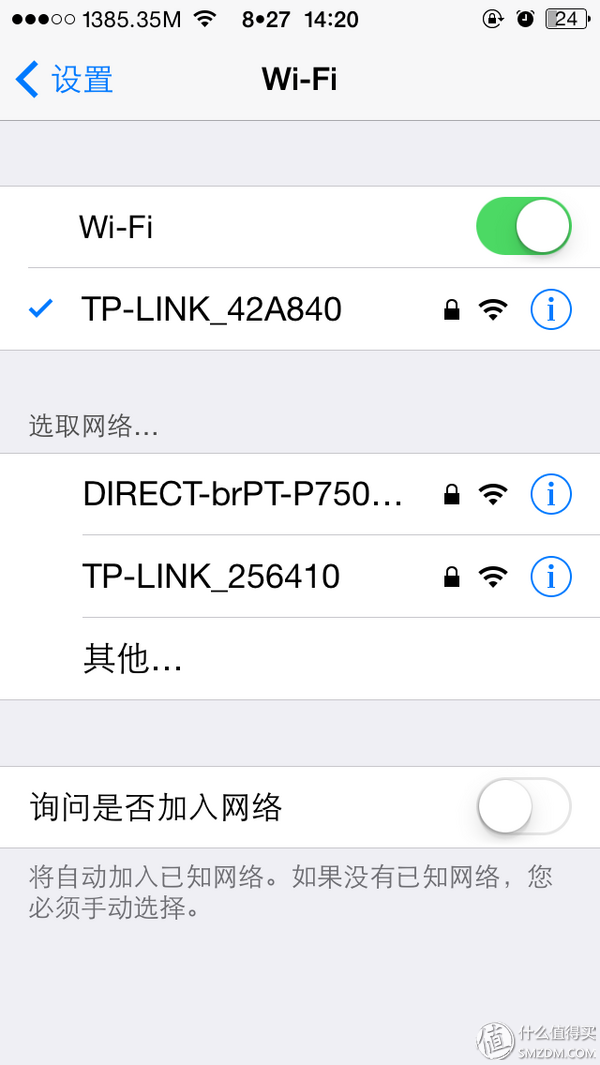
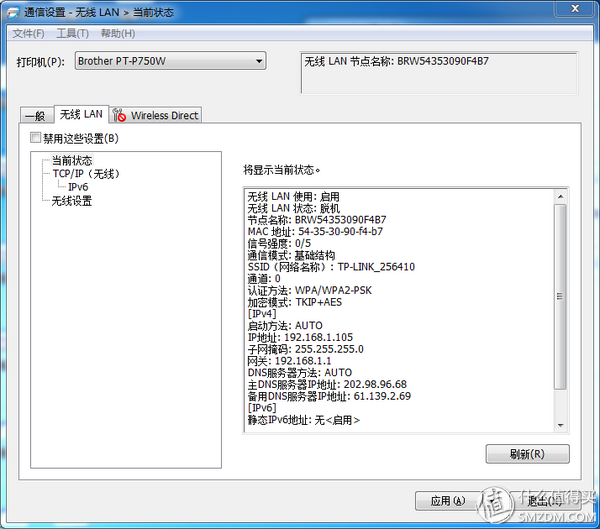
Enter the wireless lan tab, you can join the existing Wifi network. First disable the Wireless Direct feature and apply it by clicking the Disable option on this tab page. Click on the wireless settings, select your home Wifi to join the application, this time will automatically restart, and then it is the following state, this time all the same network devices can be used
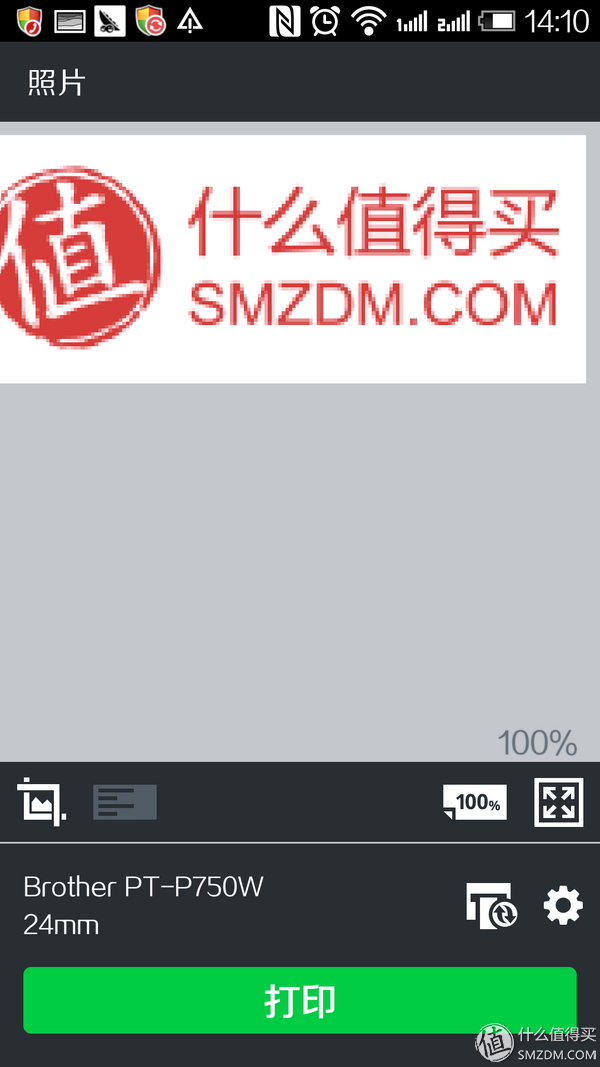
The following test with the iPhone, join the same network, open the App, you can find it (if you can not find, you can manually enter the IP connection)
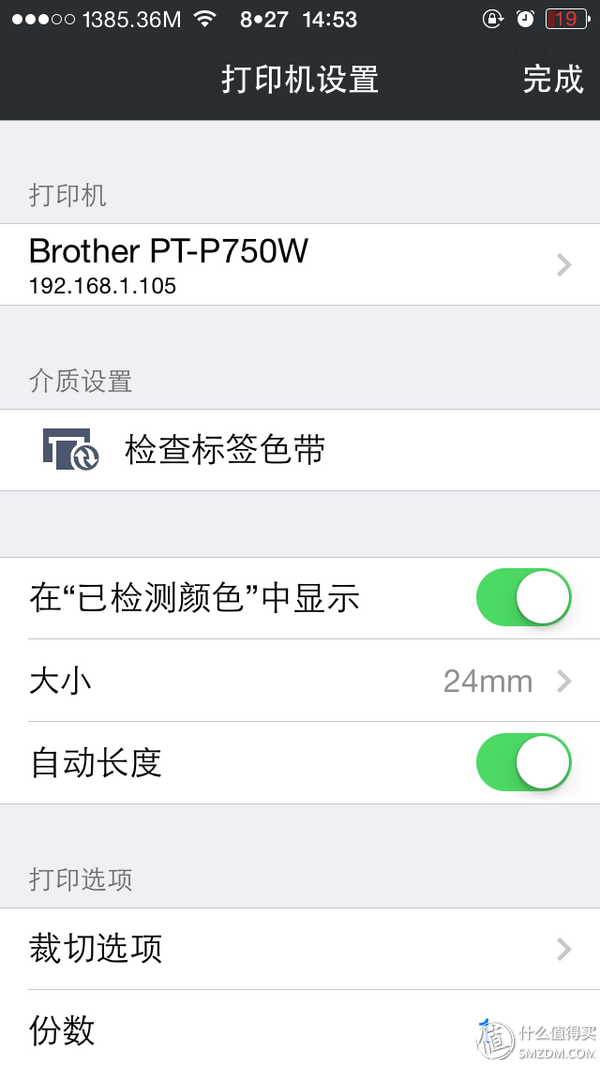
Just enter it and the print button turns green to print it
Finally, to give you a simple look at the full version of the software interface, due to too many features, and with other wired printer operations, I will not say more

Summing up, though the new features have been added to the cable, the humanization needs to be strengthened. It is suitable for small and medium-sized multi-user companies. The portability is slightly poor. It is not suitable for engineering use and can be used at home, but it is really unnecessary. . . .