Over the years, drones have become more and more common in people's lives. The US Federal Aviation Administration (FAA) speculates that at least one million drones will be sold in the United States during the Thanksgiving holiday this year, and more will be sold in other countries. Regardless of whether you like this trend, drone applications have reached an unprecedented level. In this tutorial, I will share the aerial photography experience I have summarized over the past few months. I mainly share the aerial photography experience of drones. Many of the experiences are also applicable to video recording or film shooting. It is recommended that novices can refer to this tutorial before purchasing a drone.
1, practice
UAV control can be difficult for novices. If you let a novice use a drone to take pictures or record a video, it is even more difficult. You certainly don't want to see your unmanned first flight and crash. So I suggest that you carefully understand how the drone works before aerial photography. If you don't even know the functions of the buttons on the remote control, it is still too early for you.
The excitement of the first aerial photography is undeniable, but I can't eat hot tofu. I flew a dozen times to find out the proper handling feel and skillfully control my drone in difficult flight conditions. Although I am still far from professional flying hands, I am now able to control my drone more calmly in the event of an emergency. If I just got the drone and started aerial photography, I will definitely crash it, because the novice is too busy when manipulating the drone.
It goes without saying that the first time the drone is controlled must be selected in an open space. UAV flying hands are especially susceptible to Murphy's Law, and the more worrying, the more likely it is to happen. My drone has experienced airborne out of control, flying out of sight and even failing for the first time (I am not blaming Murphy's Law). But because of my luck, and I am fully prepared, my drone has never crashed or crashed. Even if I really lose control of the crash, I will be very careful to avoid picking up valuables or people. In the event of a crash, my worst intention is to completely damage the drone.
Flying in windy weather requires extra practice. Just like canceling a flight, I can't imagine how frustrating it is to bury such expensive equipment in the wind. Even in the windy and sunny weather, my drone was almost repeatedly blown by the sudden blown wind. If you don't take the time to practice the control method, then you are likely to ruin your expensive drone in windy weather.
2, the best shot
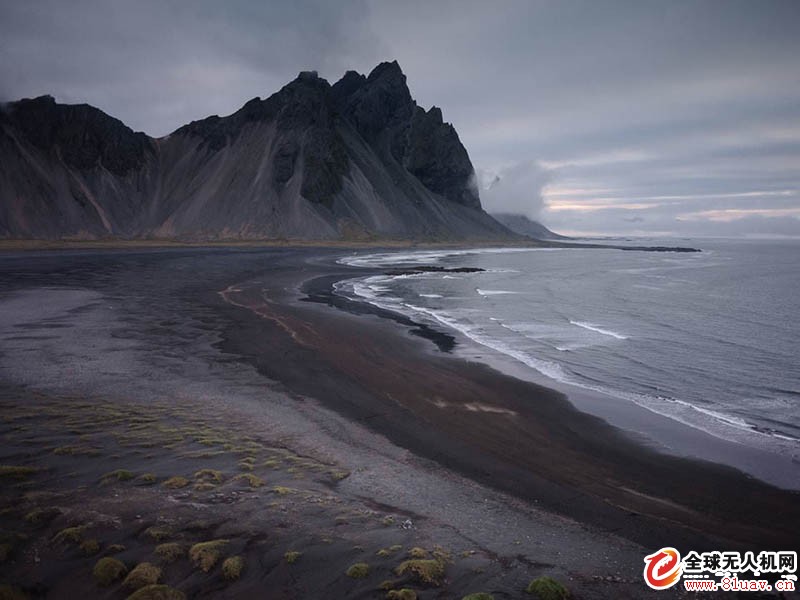
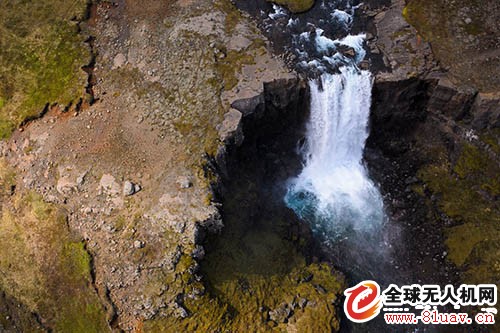
The first goal after I had a drone was to take some photos of the scenery in Iceland, especially after watching the beautiful aerial videos on the Internet. However, it was not until the end of the journey that I realized that the spectacular scenery did not necessarily perfectly explain the advantages of drone aerial photography. (The film and television aerial photography is another matter, see below for details)
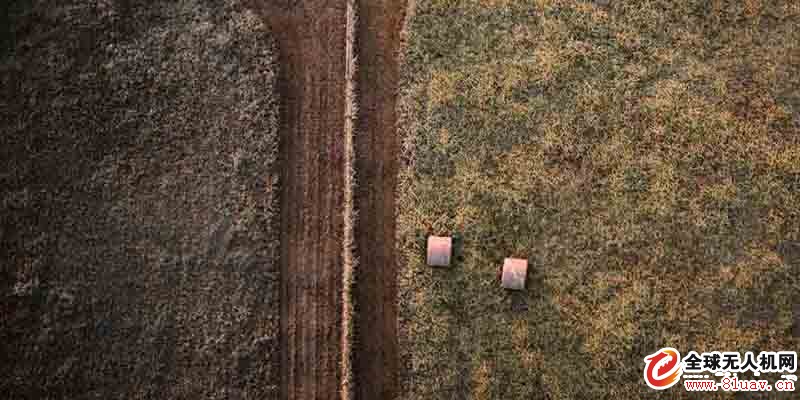
why? I think this is the result of a combination of factors, but the main reason is the uniqueness of the photo. Some aerial photographs look like they were shot on the ground, and there are no features. Even if you can see that the photos are taken from a height, some photos do not reflect the amazing things of "UAV aerial photography". Please see the photo below:
This photo was taken from a drone at a height of about 30 meters, but it looks like it was shot on the ground. Sometimes, you may be like this, because it is understandable to shoot. But I want to make a more unique aerial work, only works that can be taken by drones.
Film and television aerial photography is slightly different. If you adjust the drone's heading while recording, people will soon notice your unique shooting angle. Before I traveled to Iceland, I have seen some excellent aerial video. Obviously, most of my works still can't achieve the shocking effect.
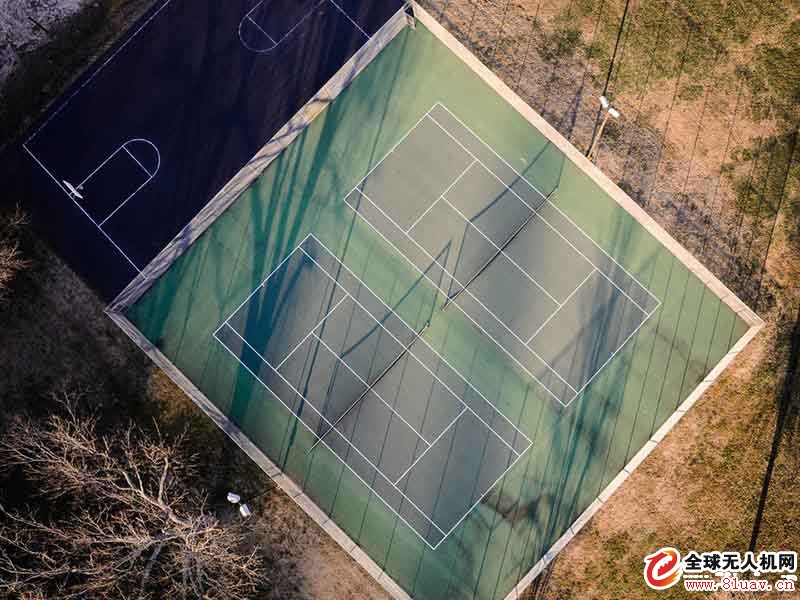
But this does not mean that drone aerial photography has no advantage, you need to use your imagination to take pictures. Sometimes, I will point the lens directly at the ground to make the picture more interesting. This method is more suitable for taking pictures. Moreover, whether it is taking pictures or videos, I feel that many man-made objects will be extraordinarily spectacular when taken from the air. Natural landscapes add unexpected elements to the human element. Ever since I discovered these findings, I began to focus on shooting scenes that were less "natural" and finally produced more satisfying works.
3, necessary accessories
If you want to use drone aerial photography, you may need to buy a lot of expensive accessories. Many drones have their own cameras - such as the popular product Dajiang Elf Phantom 3 Pro - but for some photographers and film and television workers this is not enough. The camera on the Phantom 3 Pro is equipped with a smartphone-sized sensor, which is enough for some photographers, but the effect is not ideal. So I used the Nikon Coolpix A camera instead of the GoPro camera that comes with the Dajiang Elf Phantom3 Pro, because the Coolpix A camera has a larger sensor size and better filming.
The remote control is equivalent to the drone's control system and is a standard accessory for consumer drones. My remote has two joysticks, one to control the aircraft's lift and heading, and the other to control the aircraft to fly left and right. Some remote monitors have built-in video monitors (or smartphone accessories) that allow you to view live video during aerial photography. However, this feature is only available when using the camera that comes with the drone. If you are using a third party camera. If you use a third-party camera (such as my CoolPix camera), you need to use other devices to view live video.
For this purpose, I used the TX-5D image transmitter, and the effect is not bad. This transmitter is not perfect, but I have not found a product that can match it so far. The TX-5D transmitter will send live video to my remote monitor, Elvid Skyvision. There are many kinds of monitors on the market, many of which are cheaper than this one, but I have been quite comfortable since I used Elvid Skyvision. (I originally used a cheaper monitor, but the view is not very good.) These two accessories allow me to view the images taken by the aerial camera in real time, so that I can compose the picture more accurately.
One of the necessary accessories for the drone is the PTZ. As a stabilizing mechanism for aerial cameras, the pan/tilt mounted on the bottom of the aircraft ensures that the camera can capture a stable picture during high-speed flight. This is crucial for a smooth video frame, otherwise you may be shooting a blurry picture. Fortunately, most drones (even for affordable models) are equipped with a pan/tilt for cameras, which greatly improves video quality. The PTZ can easily adjust the shooting angle of the aerial camera directly, so that you can compose the picture more freely. If you want to complete the aerial pitching operation, the PTZ can help you. Some remote controls also have a dial that adjusts the orientation of the gimbal, depending on the type of drone.
However, if you are using a third-party camera, the pan/tilt is not installed on the aircraft. Because the pan/tilt required by third-party cameras can be cumbersome and expensive. High-end pan/tilt may be as expensive as drones. I just tried a cheap pan/tilt when I bought a drone, but it was too difficult to use. For me, the PTZ is not a good value for money, because I don't use a drone to record video. In the position where the pan/tilt is installed, I have a ball head shaft to fix my camera, but I need to adjust the orientation of the ball head shaft before each takeoff. This is not very convenient, but it saves me money and reduces the weight burden.
4, picture quality
Unless you invest a lot of money, the effect of your aerial photography using drones is not as good as that of a tripod. However, the unique shooting angle of the drone can make up for the lack of image quality. You may not care about this at first (especially when recording video, because the video does not need the clarity of high-definition photos).
If you want to take a still photo, you'd better slow down the drone's flight speed. The key is that you have to hover the aircraft in the air without shaking, or even if you use the gimbal to stabilize, the photos taken at high speed will be blurred. The photos I took when I drove the drone in midair were very clear. After the aircraft has hovered, I usually take a few more photos at the same angle to avoid blurry photos. In this way, some of my aerial works have enlarged the print without affecting the image quality. Since there is no tripod stabilization, the aerial photography effect of drones will be greatly reduced in low-light environments, especially at dusk and dawn. In order to always take high-definition photos (whenever possible), I adjust the shutter speed to 1/500 second or faster. In this way, my camera will have a very high sensitivity before sunrise. The best light is the best in the fine weather with no clouds.
If you're using a high-end drone with a SLR or a micro-camera, your camera settings and normal photography settings will vary greatly. First of all, because your lens can't zoom, you need to set the focal length before the aircraft takes off. And your lens will be very far away from the subject, but even if the aperture is set to f/2.8 or larger, the entire picture will be in focus. This is very beneficial for shooting in low light environments. I recommend using the automatic mode in this case, or the aperture priority mode with a maximum shutter speed of 1/500 second for aerial photography. Be careful not to turn off highlighting; I usually use -1/3 exposure compensation.
As mentioned earlier, many drones come with their own cameras or compatible with GoPro cameras. I recommend using the automatic mode for shooting in this case, because only when all the parameters are set, your camera can take a good movie. If you are a senior photographer, you can boldly try the manual mode. But in fact, this is completely unnecessary, because the handling of the aircraft needs to be focused and cautious, in this case, if you have to manually set the camera parameters, it will be too busy.

5, power saving
When I flipped through the instructions, the impression was that the emergency was no longer an opportunity to return to the take-off location by default. If your drone fails over the water, this feature can be a lifesaver. I have used this feature more than once. But unfortunately, the drone will not automatically return to the take-off location if the battery is exhausted. If your drone is in a hurry in the air, it will land immediately, even if it is a piece of water.
My advice is that you have to be alert to the battery status. It is easy to run out of power during aerial photography, so you must be able to calculate how long your drone can fly. When I first started aerial photography, I didn't notice that the battery was exhausted. As a result, I couldn't control it when the aircraft landed automatically. Fortunately, I was standing in the middle of an open space, but that experience was a painful lesson for me. The experience of aerial photography with drones is wonderful, but always be alert to the flight status of the aircraft, which will greatly reduce this wonderful experience.
The best way to avoid running out of battery power, especially for still photography, is to start the drone at the location you want to take. With such rapid take-off and landing, you don't have to waste too much power to find the best shooting angle. If you solve most of the problems on the ground, you can make full use of the flight time of the drone for aerial photography.
If it is a cumbersome camera, be alert to the battery status. If you are using a large PTZ and SLR camera, your UAV will not have a long flight time. My Coolpix camera is also very fast, even though it only has 300 grams. Part of the reason I don't want to use the gimbal is here. Yuntai is very helpful for composition and video, but they are too heavy. If you want to compose a picture on the ground, a ball-end shaft is enough, and it's still very light.
Finally, it's worth noting that your battery drain is also related to the external environment. The battery consumes less power at cold temperatures, reducing the drone's flight time by several times. Similarly, in windy weather, it is difficult for you to hover your drone in a stable place. In this case, the battery will consume much more power than usual. Under ideal flight conditions, I can usually fly for about ten minutes; under harsh conditions, I can only fly for about five minutes (although I rarely fly in windy weather). Although it is only ten minutes, if I think about composition in advance, time is enough. Every time I fly a drone, I carry three batteries with me, so that I can have enough power to shoot the picture I have conceived.
6. Law and privacy
The laws and regulations of drones have not yet been determined, and I am not an expert in this field. Even so, I suggest that you never do stupid things, especially not using drones in hazardous areas. In addition, the laws and regulations on drones vary according to different countries or regions.
In the United States, the Federal Aviation Administration (FAA) has established legal provisions restricting the use of drones. First, the flying height of the drone is prohibited to exceed 400 feet (about 122 meters), although many drones cannot achieve such flying heights. Secondly, it is forbidden to use drone aerial works for commercial purposes (unless approved by the Federal Aviation Administration (FAA)) and to prohibit the use of drones within 5 miles (about 8 km) of the airport. In addition to this, there are many other legal regulations. The most complete website I have found is http://knowbeforeyoufly.org/. The content on this website is primarily for the United States, but no matter which state you live in, you can learn a lot of useful drone laws and regulations from here. If you live in Europe, you can find similar information on the Heli Guy website.
I will try to avoid taking photos that may violate the privacy of others. I will definitely not fly the drone to someone else's house or courtyard. This seems to be legal (although people have serious differences), but I strongly recommend that you do not try. Don't bother your neighbors, it's not worth it for a normal courtyard photo. However, with the increasing popularity of drones, such a situation is inevitable in the future. We only recovered from the concerns of Google Maps, didn't we?
Please note that if you are in the United States, your drone must be registered with the Federal Aviation Administration (FAA). You will be charged a $5 fine when you register, but if you complete the registration before January 20, 2016, the money will be refunded to you. Please note that the information you provide on this website will be public, at least under the current architecture. As a drone owner, your privacy may be exposed, which I think is a bit ironic. But from another angle, if you have a drone, this rule may be worth observing, because you certainly don't want to be detained because there is no registration code, especially if your drone crashes in a hard-to-reach place.
Drones are not for everyone, and as more and more people start using drones, I am starting to become more cautious. I believe that most drone users know how to operate safely. Frankly speaking, most people only fly a few times a year, but drones are so common today, and major accidents are almost inevitable. If every drone user can exercise caution and respect others, the drone will not be considered a source of sin.
UAVs can be a powerful tool for aerial photography and film production because they enable shooting angles that are not possible with ordinary cameras. I am very happy to be involved in this budding sport, and I will continue to explore new aerial objects. However, drones can't directly improve your photo level like magic. The key to capturing high-quality photos is to find interesting objects and themes, especially those that are particularly eye-catching when taken from the air.
Disposable Oil Vaporizer,Ceramic Oil Vaporizer,Cbd Juice Vaporizer,Disposable Cbd Juice Oil Vaporizer
ALD GROUP LIMITED , https://www.aldvapor.com